Box Info
Box Name: Mirai
Listed Difficulty Rating: Easy
chasepd’s Difficulty Rating: Very Easy
Release Date: 2017
Tech Stack: Pi-hole, SSH, DNS
Skills Learned: Default credentials, sudo abuse, file recovery via strings
Recon
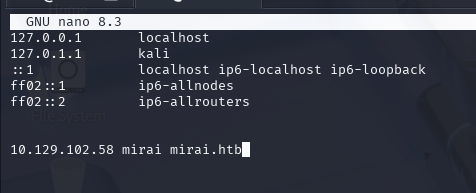
Let’s get started by adding some hostnames for the box for easier use. I always add boxname as well as boxname.htb to start with.
Next, we run an nmap scan to get a basic topography of what is going on on the box.
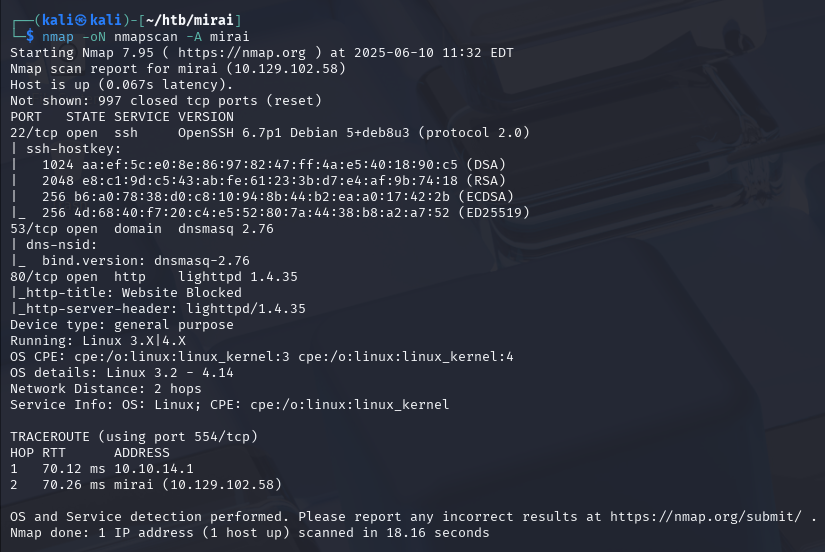
The nmap scan gives us a bunch of information. We can ssh into the box if we get credentials. The server is hosting DNS, so we may be able to extract some info about subdomains or alternate hostnames for the box there. Also, there’s a website.
Let’s start with the website and see what is going on there.
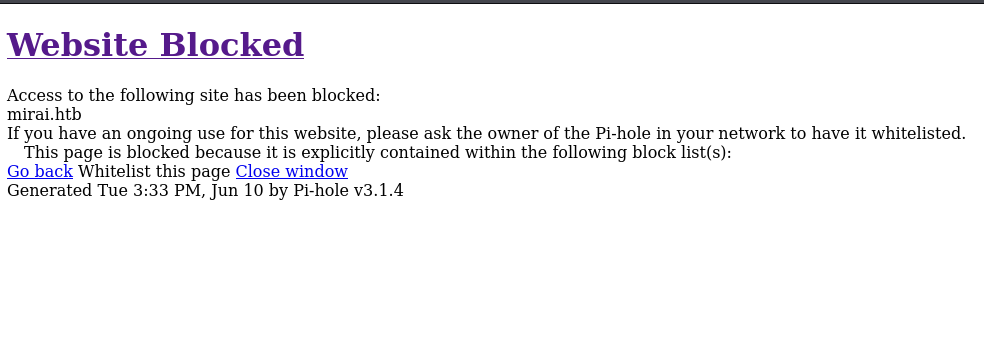
We appear to be getting blocked right at the root page. However, this is a goldmine of information. We can see right away that this is running Pi-hole, the custom DNS that assists with ad blocking and typically runs on a Raspberry Pi.
Even better, it’s giving us a version number - Pi-hole v3.1.4.
Initial Foothold
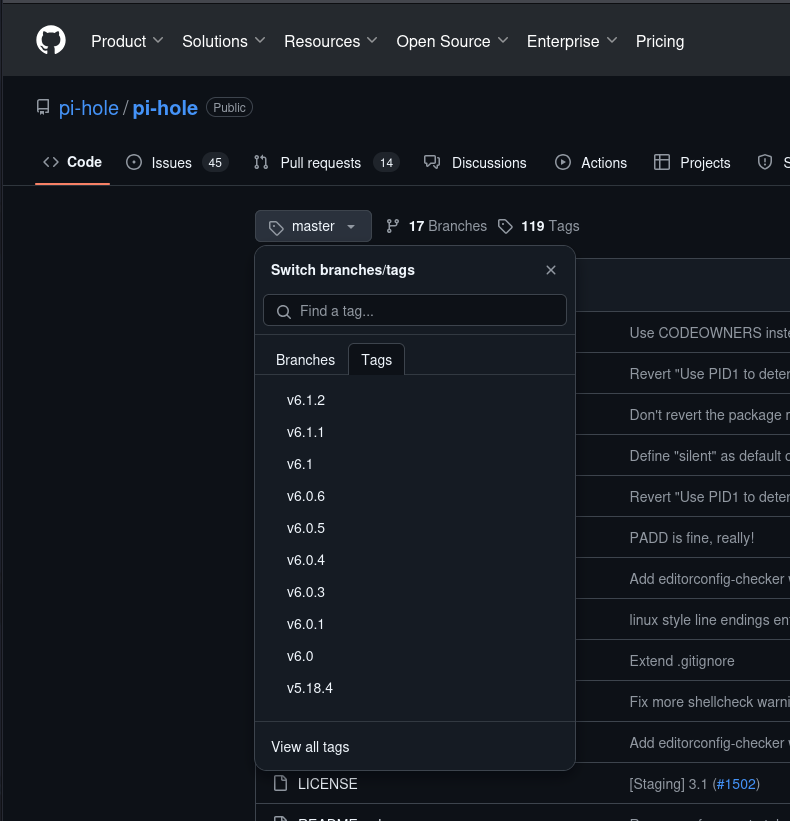
Looking up that version in the Github repo, we see that the current version is v6.1.2:
So this version of Pi-hole is quite old. We can confirm this by using the tags to find v3.1.4:
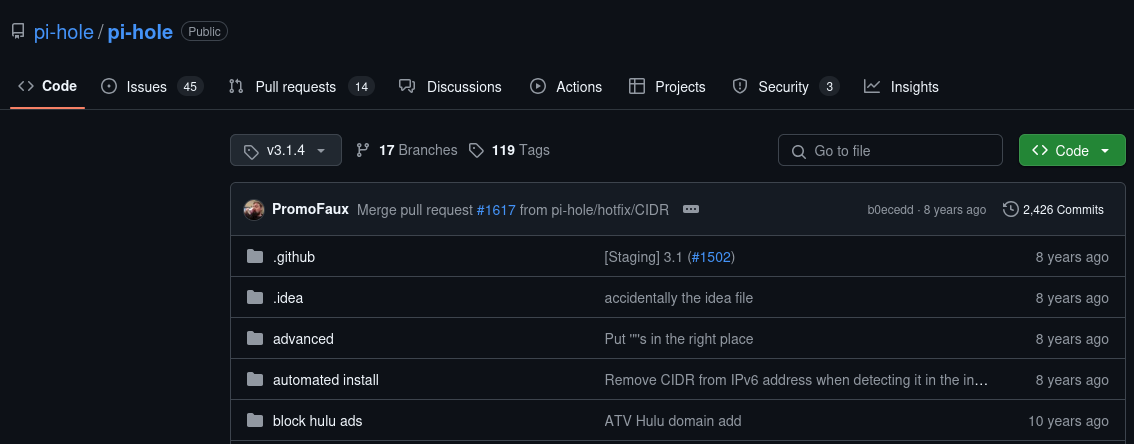
That version is about 8 years old (i.e. it was released around 2017, which makes sense, as that is when the box was originally put up on Hack the Box).
One of the most popular Raspberry Pi operating systems is Raspberry Pi OS, formerly known as Raspbian. For a long time Raspbian used a set of default credentials for login (see this article about it). Raspberry Pi OS now has the user set a password rather than having a default, but this box is old enough that there may still have been default credentials at the time.
From the linked article, we can see that the default credentials for Raspbian are pi:raspberry. Let’s give it a shot.
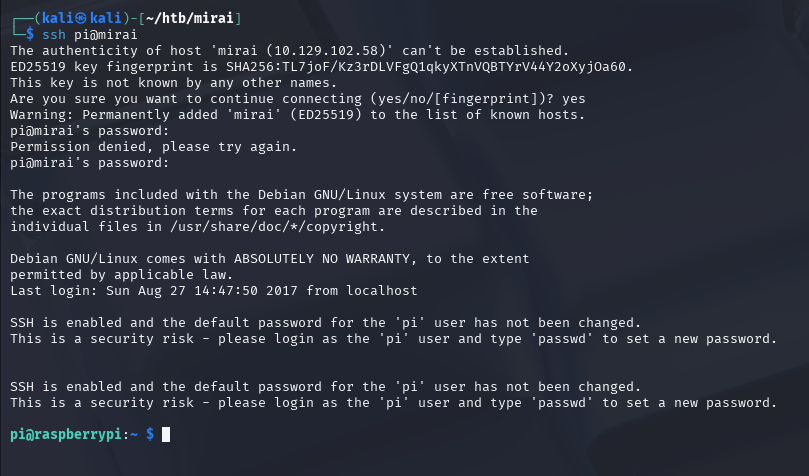
Sure enough, we’re in on the box. Furthermore, in the Desktop folder, we find user.txt:

Privilege Escalation
The first thing I always do after getting SSH access for a user is check their Sudo permissions to see if they can run anything with no password (or anything at all, if I have the user’s password). Let’s check that for the pi user with sudo -l.

We appear to have hit the jackpot since not only can pi run anything as any user via sudo, but it also can run anything as any user without a password.
It seems too good to be true until we use sudo su and find ourselves in a root shell on the box. However, there’s a snag when we go to grab root.txt:

Forensics
The note mentions that there’s a backup on the USB. When a USB drive is connected to a linux machine, it shows up in the /media/ folder. Navigating there we see that there’s a USB stick there, as well as a note in damnit.txt:

Damn it, indeed, James. Looking in lost+found just to see if it was hidden there (lost+found is an ext filesystem directory for recovered files or file fragments after a filesystem check), we see that it’s not there.
However, James’ note gives us a clue - is there any way to recover deleted files? When a file is deleted, the operating system doesn’t actually take the time to scrub the parts of the storage device that hosted the file. Instead, it just deletes the filesystem link to that file, which means it no longer is referenced in the filesystem metadata, and your operating system can’t see it or find it. However, the data is still stored on the device until those memory addresses are reused and overwritten with something else.
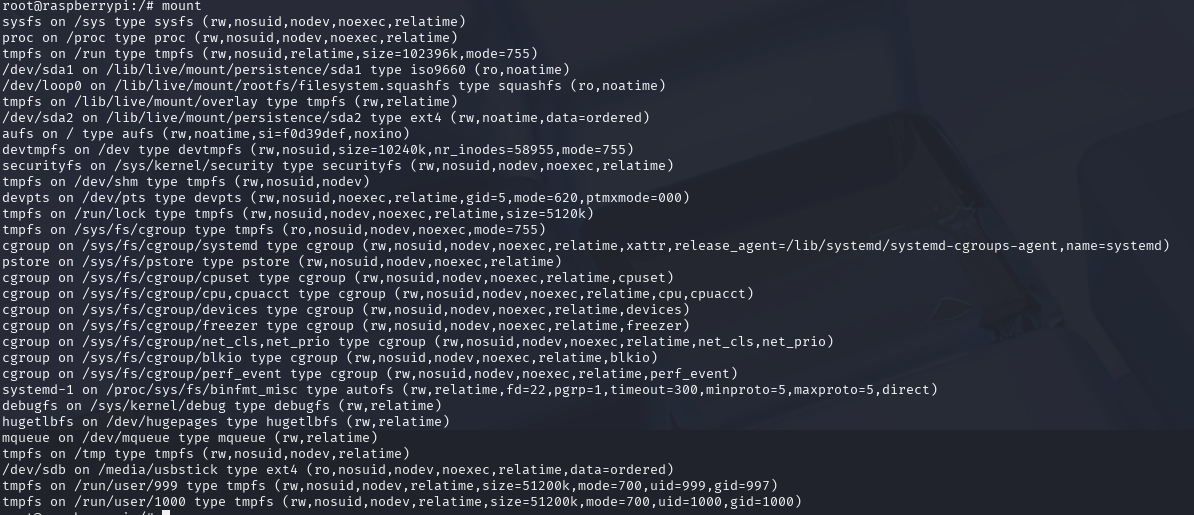
Furthermore - everything on Linux is a file. With the mount command we can see all the currently mounted filesystems. Sure enough, we can see that /dev/sdb is the block device for the USB stick, and it is currently mounted at /media/usbstick.
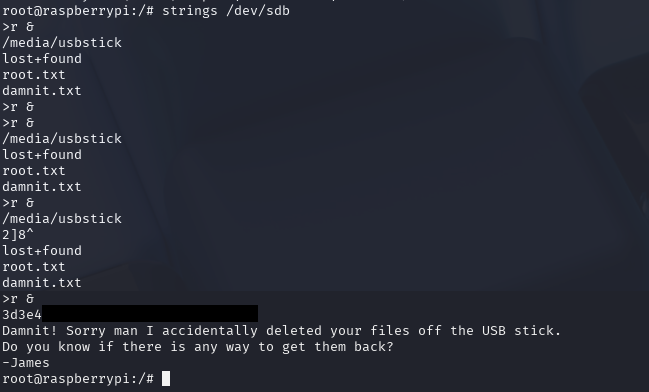
The strings command looks for all data in a file that appears to be a string. As we discussed earlier, everything is essentially a file on Linux, and we can reference the block device the same way as any other file. If we run strings on the block device /dev/sdb, it should look through all of memory on the USB stick for strings, because by accessing /dev/sdb, we are actually accessing the raw storage medium of the device, not just the filesystem metadata. With any luck, we’ll find root.txt.
Sure enough, we’ve got it, and with that, we’ve Hacked this Box.
Closing the Vulnerability
- When designing software, never include default credentials. Always have the user set their own credentials where possible.
- On systems that do use default credentials, change the password immediately after logging in for the first time.
- Restrict overly-broad sudo permissions for users.
Key Penetration Testing Takeaways
- Check version numbers, and look up information about identified versions
- Sometimes the simple answer is the right one.
stringsis a more powerful tool than it may seem at first glance.sudo -lis an essential first step for privilege escalation on Linux machines.